
1501 St. Paul St. Bellingham, WA 98229
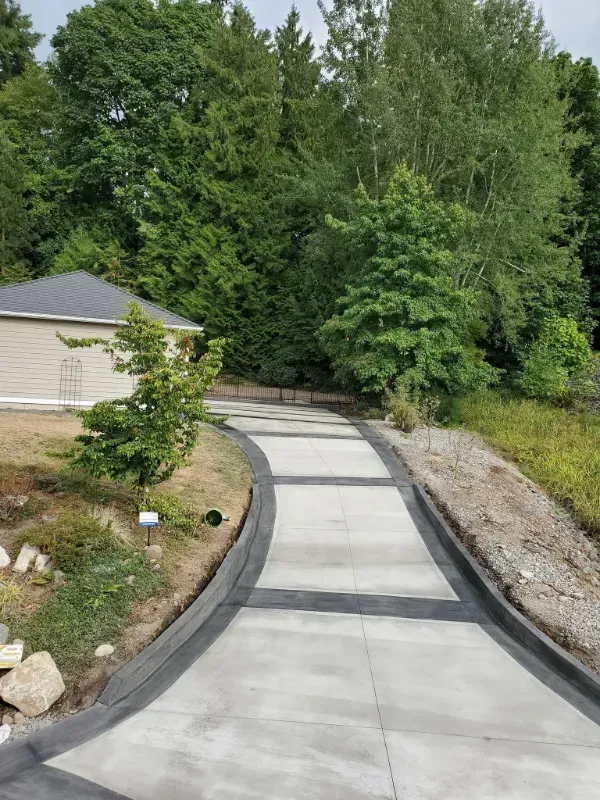
Concrete Installation: Prepare Your Site Like a Pro
December 16, 2024
Understanding the Importance of Proper Site Preparation
Effective concrete installation starts with meticulous site preparation. This critical first step ensures your project remains durable and dependable for years to come. Without proper groundwork, issues like cracks, uneven surfaces, or structural instability can arise, undermining the integrity of the entire installation. Think of preparation as crafting a blueprint for success—when every detail is attended to, the results speak for themselves.
By leveling and reinforcing the site with precision, you’re creating a foundation built to endure. Whether facing heavy use or fluctuating weather, a well-prepared base guarantees the resilience and longevity of your concrete installation, safeguarding your investment for decades.
Tools and Materials Needed for Concrete Site Preparation
Thorough site preparation is key to a durable concrete installation, and having the proper tools and materials ready makes the process more efficient. Here’s what you’ll need to get started:
- Shovels: For digging and clearing debris.
- Rake: To level and spread soil or gravel.
- Tamper/plate compactor: Ensures a solid, compacted base.
- Level: Critical for achieving an even surface.
- Measuring tape: For accurate dimensions and layout.
- Stakes and string: To mark the project boundaries.
- Mini-excavator: Useful for larger excavation tasks.
Materials also play a crucial role in preparation:
- Gravel/crushed stone: Ensures a firm base that allows for efficient water flow.
- Form boards: Define the concrete's shape and edges.
- Rebar/wire mesh: Adds strength and prevents cracking.
Starting with these essentials ensures a smooth workflow and sets the foundation for a lasting concrete project.
Assessing the Site: Choosing the Right Location for Concrete
The success of any concrete installation starts with selecting the ideal location. Begin by defining the project’s purpose—whether it’s a patio, driveway, or foundation—and assess practical factors like drainage, soil stability, and proximity to existing structures. A well-chosen site with proper water runoff and stable ground ensures the installation stands strong for years to come.
Pay close attention to the soil’s condition. Unstable or loose soil may need grading or reinforcement to create a reliable base. Thoughtful site evaluation not only prevents future issues but also streamlines the process, laying the groundwork for a durable, trouble-free concrete installation.
Clearing the Area: Removing Grass, Debris, and Obstacles
Preparing the site is a critical step in ensuring a successful concrete installation. Start by removing all grass, roots, rocks, and debris from the area. Leftover materials can compromise the concrete’s ability to settle and cure, leading to long-term structural issues. Using tools like a shovel or sod cutter, strip away the top layer of soil to eliminate organic material that might decompose over time.
Going beyond surface-level preparation, dig deeper to create a stable foundation. This extra effort prevents future shifting and provides a durable base for your concrete installation, setting the stage for a project that lasts for years to come.
Marking and Measuring the Site for Accuracy
Accuracy is key when preparing for a concrete installation. Begin by outlining the project’s boundaries with stakes and string, ensuring the layout aligns perfectly with your design. Use a tape measure to verify dimensions and a level to confirm that lines are straight and corners are square. This step lays the foundation—literally—for a successful build.
Precise markings do more than guide the pour; they ensure the concrete installation meets your exact specifications and avoids costly adjustments later. By investing extra care in this stage, you pave the way for a flawless, professional finish.
Excavation: Digging to the Proper Depth for Your Concrete Slab
Excavation marks the critical first step in a successful concrete installation. For most projects, dig 6–8 inches to accommodate the subbase and concrete layers, ensuring consistent depth across the entire site. A shovel works for smaller jobs, while a mini-excavator is ideal for larger areas. Uneven excavation can weaken the final structure, so check your depth frequently. Once the site is properly excavated, you’re ready to create a sturdy subbase—the foundation of a strong and durable concrete installation.
Grading the Site: Ensuring a Level and Stable Surface
Proper grading is essential for a successful concrete installation. Once excavation is complete, level the soil with a rake and compact it using a tamper, ensuring a smooth, even surface. This critical step prevents uneven concrete, drainage problems, and potential cracking over time. Use a level to maintain precision, and if slopes are needed for drainage, ensure they’re deliberate and uniform. Thoughtful grading lays the groundwork for a durable, stable concrete installation that stands the test of time.
Adding a Gravel Subbase: Building a Solid Foundation
A well-prepared subbase is the backbone of a successful concrete installation. First, cover the site with a 4-inch thick layer of gravel or crushed stone. This layer acts as a stabilizer, evenly distributing weight and minimizing soil movement beneath the concrete. Compact the subbase thoroughly with a tamper or plate compactor to eliminate air pockets and create a firm foundation. Skipping this critical step compromises the integrity of your project, as even expertly poured concrete relies on a stable base for durability and longevity.
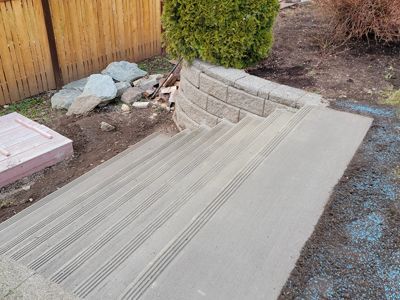
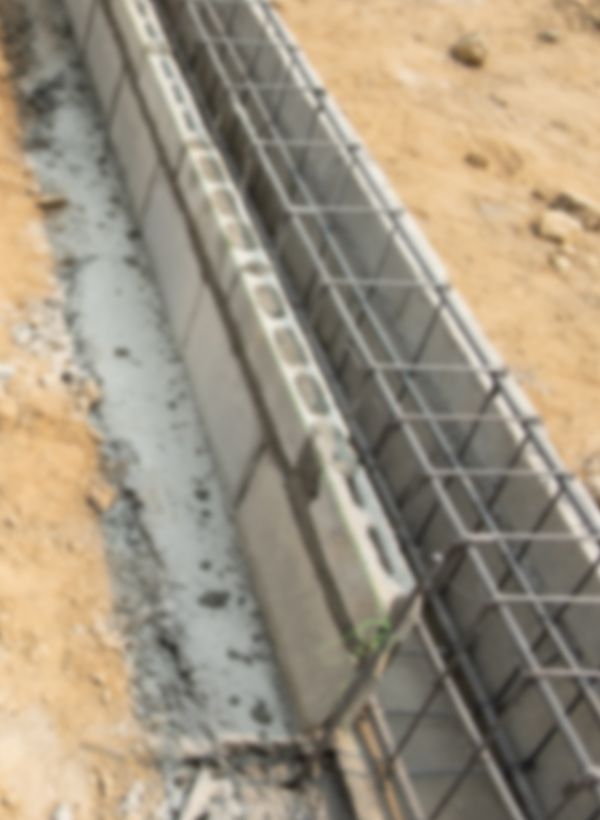
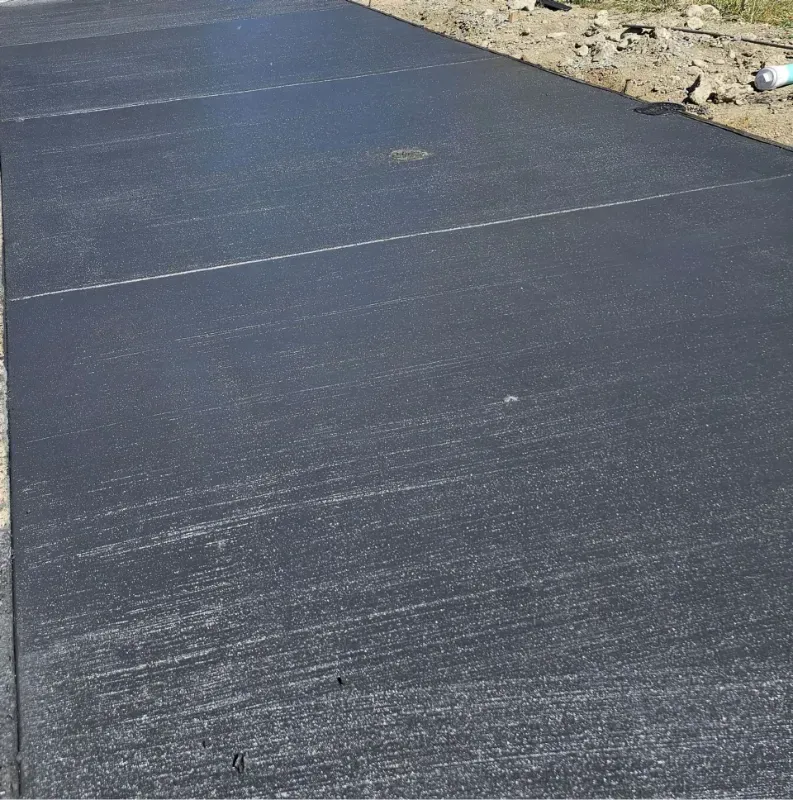
Installing Forms: Creating a Frame for Your Concrete Project
Properly set forms are essential for a successful concrete installation. These molds, made from sturdy wood or metal boards, outline the shape and dimensions of your project. Secure the forms with stakes, ensuring they’re tightly in place to prevent movement during the pour. By creating clean, well-defined boundaries, forms guarantee precise edges and a polished final appearance.
Take the time to align and level the forms meticulously. This preparation step is crucial to achieving a seamless and professional finish. Careful planning now prevents costly adjustments later, allowing your concrete installation to stand out for its durability and aesthetic quality.
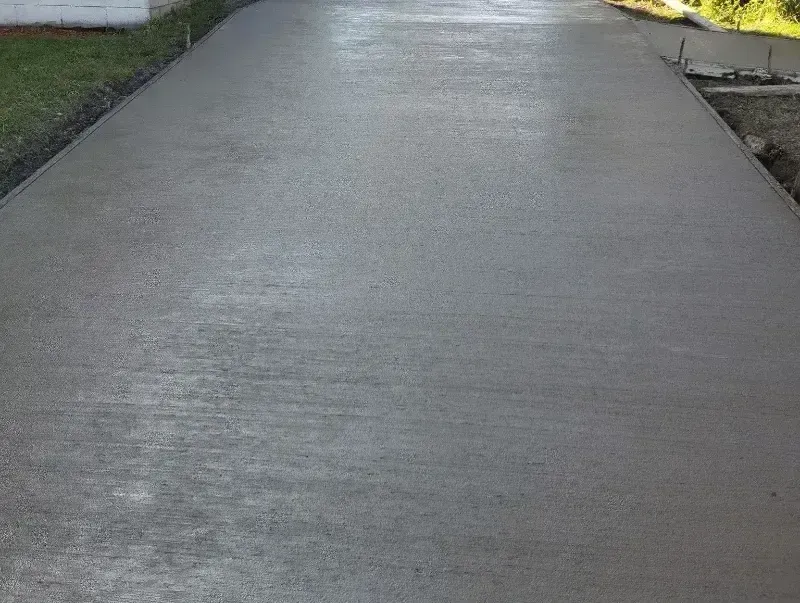
Final Checklist: Preparing for a Smooth Concrete Installation
Thorough preparation is the foundation of any successful concrete installation. Before pouring begins, verify that the site is cleared of debris, properly graded, and that all forms are securely in place and precisely aligned. These essential steps ensure your project starts on the right track, minimizing the risk of costly mistakes later.
Attention to detail makes all the difference. A well-prepared site guarantees a durable, professional finish that will last for years. Ready to bring your vision to life? Contact
Puget Sound Concrete LLC in Bellingham at
360-927-1860
for expert guidance and reliable service on your next concrete installation.
Learn how to prevent common concrete foundation issues with proper site prep, moisture control, and soil testing to avoid cracks and settlement.
Learn how to integrate a concrete finish with landscaping for a cohesive look. Puget Sound Concrete shares tips on patterns, textures, and natural transitions.
Explore the key steps for a strong concrete foundation, including site assessment, reinforcement, and curing. Build a solid base for your home or business.

Learn how to maintain your concrete surfaces with expert tips on cleaning, sealing, and repairs. Keep your driveways and patios durable and beautiful.

Discover how stamped concrete adds value to your property by enhancing curb appeal, durability, and style in outdoor spaces. Transform your home today!

Find out which types of concrete finishes are best for your Bellingham project. If you feel overwhelmed, contact us at 360-927-1860 for expert guidance.
Explore the benefits of concrete sidewalks for safety, durability and aesthetics. Enhance your property with durable, stylish, and cost-effective solutions.

Here are 10 things to remember when caring for your driveway! Understanding Concrete Driveway Maintenance Keeping your concrete driveway in top-notch condition is like giving your car regular oil changes – it keeps things running smoothly for years to come. While concrete driveways are inherently durable, they require periodic maintenance to avoid issues such as cracks and stains that can detract from their appearance. Effective driveway maintenance revolves around two key practices: regular cleaning and periodic sealing. Think of this as a rejuvenating spa treatment for your driveway. Regular sweeping and washing can preserve its cleanliness and structural integrity. Additionally, applying a quality sealer every few years forms a protective barrier against environmental factors, ensuring your driveway remains resilient and visually appealing throughout the seasons. Cleaning Your Concrete Driveway: Essential Steps Transforming your driveway from sooty to spotless can be surprisingly satisfying! You can start by sweeping away leaves and dirt to expose your beautiful concrete. A sturdy broom works wonders, but if you've got a leaf blower handy, it can speed up the process and make your job easier. Once you've cleared the surface, it's time for a refreshing wash. Mix a little dish soap with water, and use a stiff brush to scrub away stains and spots. If you really want to go the extra mile, a power washer can provide a deep clean, but remember to use it cautiously to avoid damaging the surface with excessive pressure. With these steps, your driveway will be looking fresh and inviting in no time!
Concrete is a durable and one of the most versatile building materials. Its robust nature makes it a favored material for driveways, sidewalks, patios, indoor flooring, and other concrete surfaces. While it is admired for its strength, concrete can still succumb to normal wear and tear.
Are you a new homeowner or a seasoned property owner undergoing building renovation? One of the biggest decisions you will make is choosing the right concrete finish for your property. With so many types of concrete finishes available, it can be overwhelming to pick the right one that will meet your needs and preferences.

